Tape, Grind, Dry Fit
I managed to tape the inside seam of the main housing, and spent a couple days flat on my back on the concrete floor grinding the perfect rebate in the hull in order to get the drive to sit truly flush. The engine end of the cassette still needs a 1/4" G10 plate to add structure, and act as a flat and true mount for the prop shaft hardware. It's a huge relief to get this thing in the boat and to really confirm that the height for the future bump in the cockpit floor will not be obnoxious.


This custom piece fabricated by Betts Boats will penetrate the skinny end of the housing, and it's future alignment will be critical.

The upper trunk is narrower and really just serves as a place for the strut arm to live when the drive is fully retracted. Here's a few pics of it mocked up atop the primary housing. Word is that I shouldn't glue this altogether until future stages to make sure that everything fits and aligns properly.


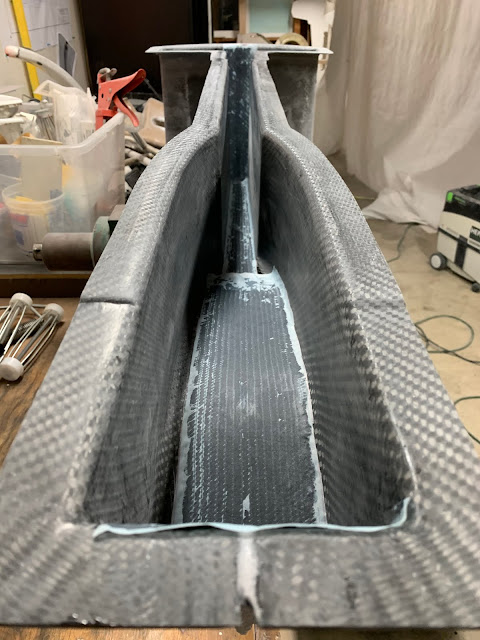
Glassing in a narrow gutter takes high tech tools. This was something that would have been a huge challenge to me a couple years ago, but now is easy with the tricks picked up from friends along the way.

This custom piece fabricated by Betts Boats will penetrate the skinny end of the housing, and it's future alignment will be critical.

The upper trunk is narrower and really just serves as a place for the strut arm to live when the drive is fully retracted. Here's a few pics of it mocked up atop the primary housing. Word is that I shouldn't glue this altogether until future stages to make sure that everything fits and aligns properly.


As the strut is not yet fabricated, I tile printed the part on a bunch of 8.5 x 11 sheets of paper and spray glued the assembled printout to a chunk of scrap pvc foam to create a 1:1 model. With the housing clamped in the boat, and the pvc model in the retracted position, I was finally able to get a bead on how big a hump I need to create on the cockpit floor.


Comments