Hump Day Mold
Using the fake foam strut mockup, I went around in a few circles modeling the cockpit floor hump. The criteria are complicated. First and foremost, the hump, or barney post, must be large enough that the strut can fully retract up into it. There also needs to be some room inside for the block and tackle that pull it up and down. At the same time, I want the new Harken hydraulic pump for the mast ram to pop out of the front, so the main trimmer can de-power the rig without bringing another body off the rail. In my mind, this hydraulic needs to pump side to side, rather than fore and aft. Last, the traveller passes across the top, and the mainsheet fine and course tune both need to sit right there, just like on a stock Melges 32.
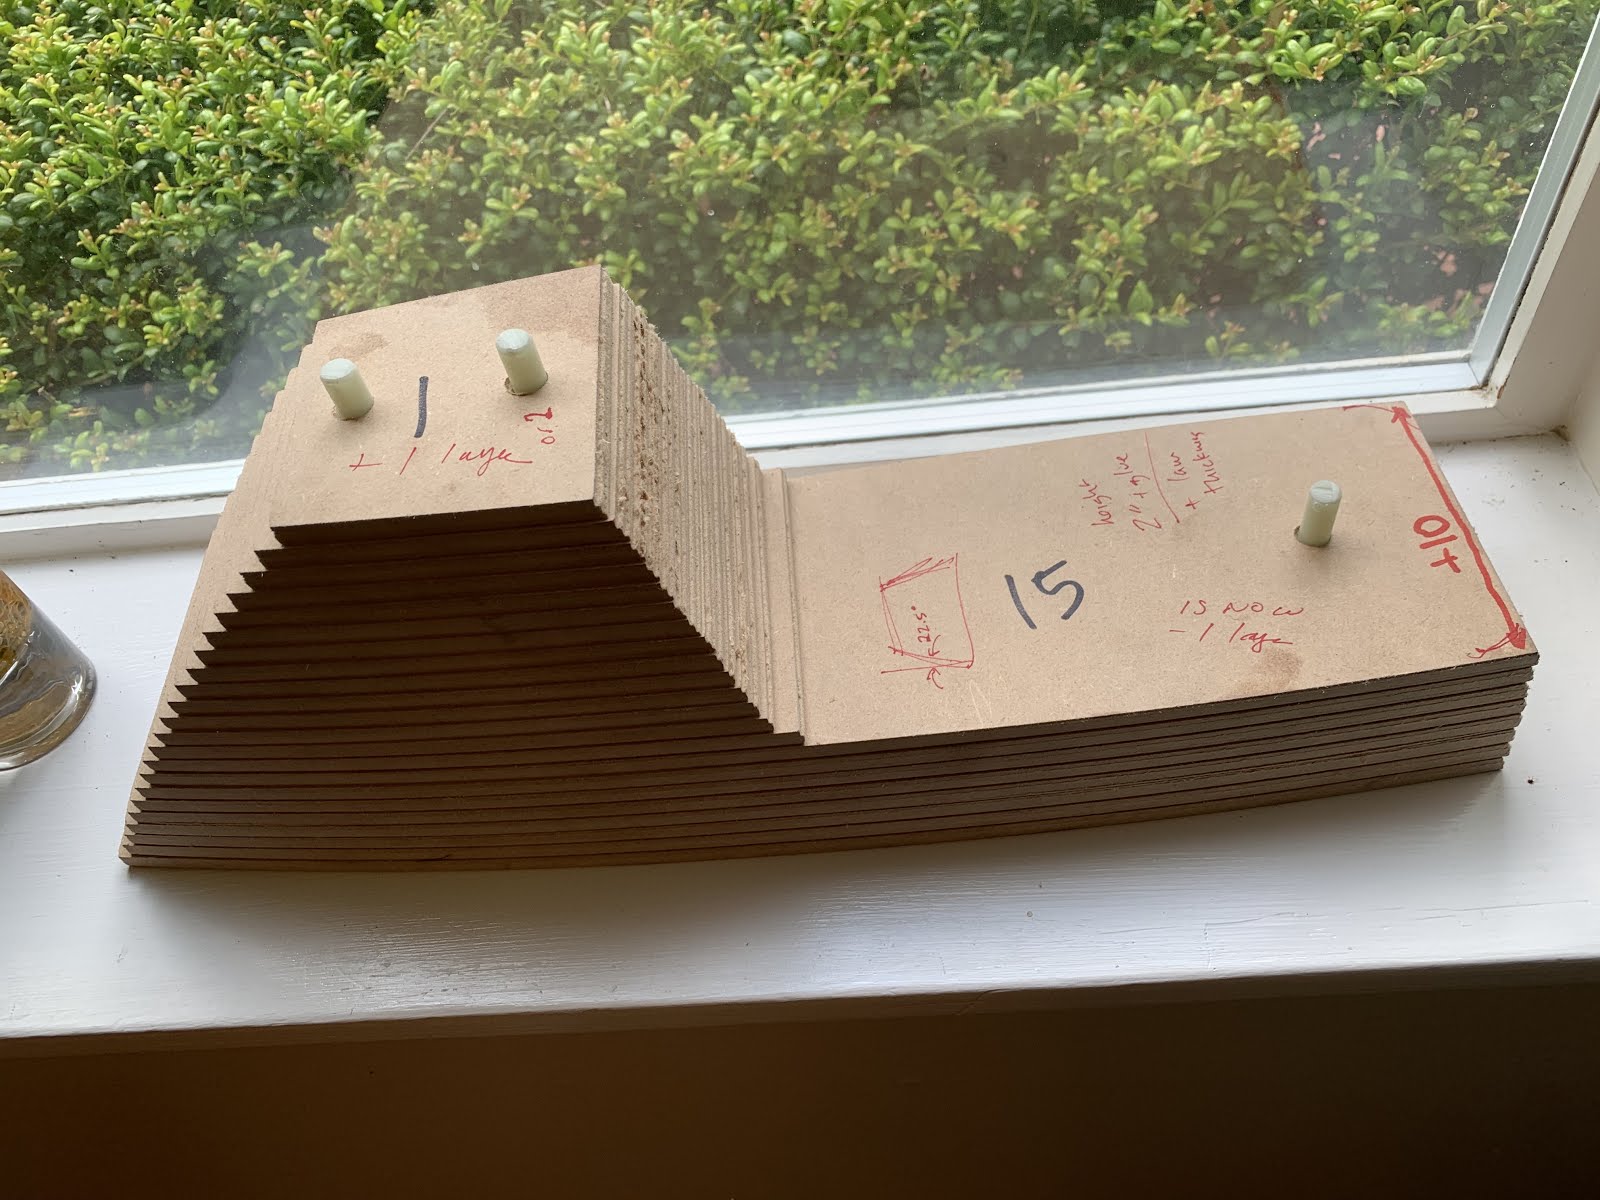
I used the Dan-Land 3D printer once again, this time with 1/4" MDF. I am really becoming a HUGE fan of slicing a 3D model in Rhino, and smoking it out on the 2D plotter as a series of stackable plates. With a couple alignment dowels, it's a snap to create really complex parts in the absence of a proper CNC machine. Once the plates are glued up, it's pretty effortless to sand off the facets. The added bonus is that the crisp layering kind of tells you how far to sand in a given spot. As soon as the ridges are gone, you're there. Lastly, the part sort of self corrects, as the sanding surface area increase as you dig down knocking off the tops of the mountains, areas that need more sanding cut down faster naturally. In this process, the part gets progressively slower to sand with the ever increasing surface area as you approach the final shape.

The first part I made is shown here. It was a little smaller, and it seemed just too tight on width for the Hydraulic. I wasn't that excited to remodel and do it again, but nonetheless, I added some width, a little height to the tower, and I almost tripled the draft angle to get more geometric stability for the mainsheet load.

The final part is shown here in Rhino. In the following pics, one might notice that a singular layer of MDF was messed up coming off the machine. Around mid-stack there is an incorrect layer, but I decided to fill that area with bog rather than re-milling.


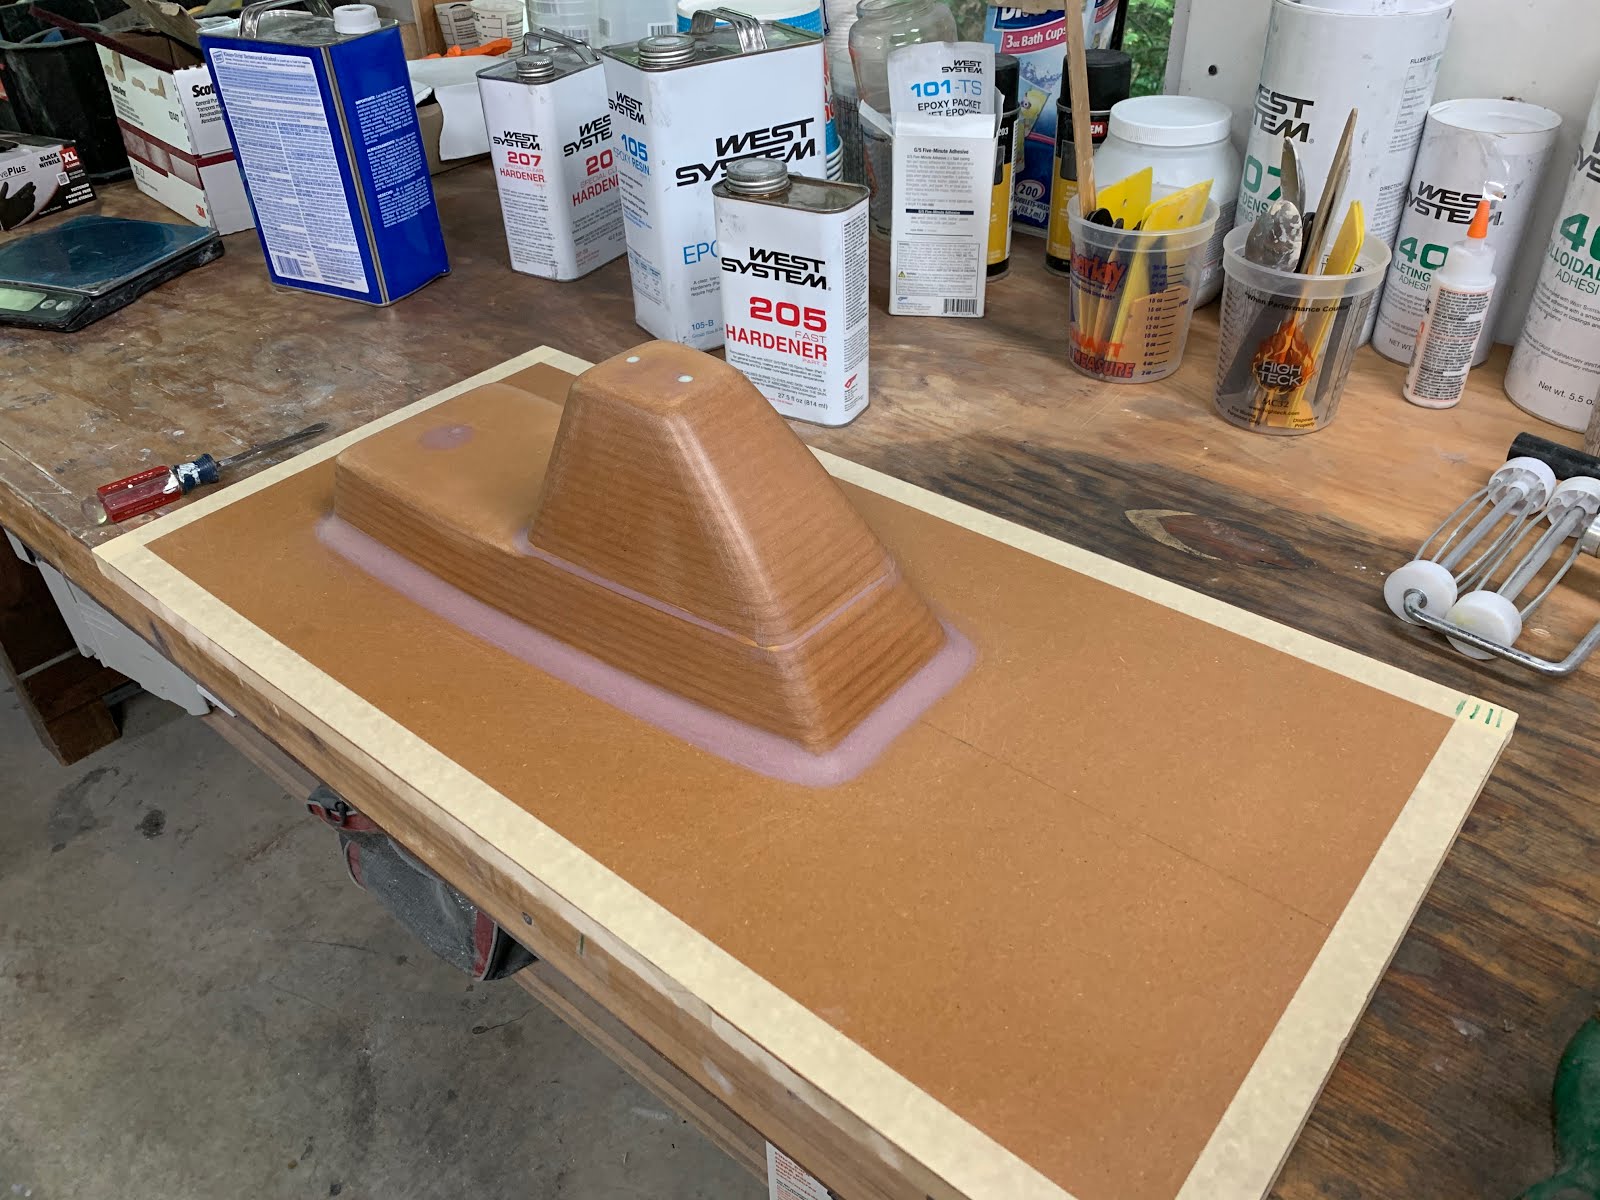
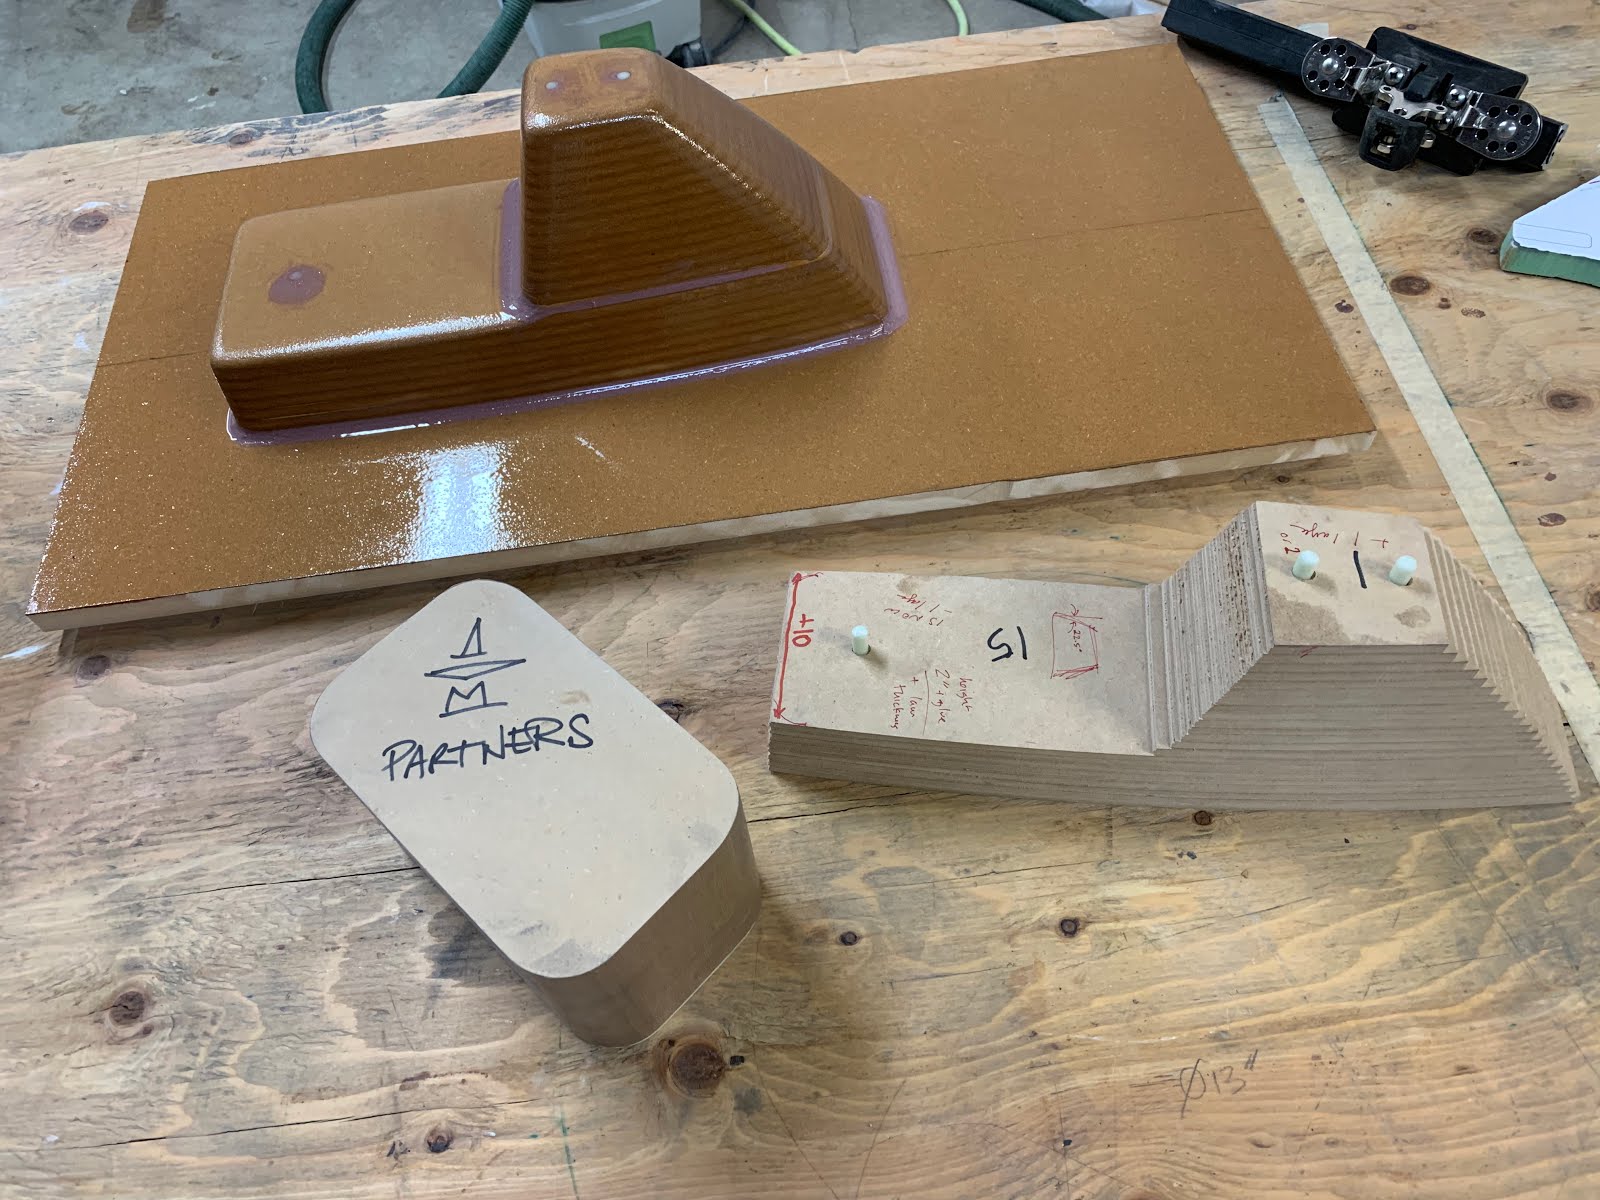
After a quick sand to bring it into shape, I rolled on a coat West 105/207 and added fillets (which I later decided to increase in radius).

Finally, it was 4 coats of mold release wax, and one last check of the geometry with the hardware that it will house.


I used the Dan-Land 3D printer once again, this time with 1/4" MDF. I am really becoming a HUGE fan of slicing a 3D model in Rhino, and smoking it out on the 2D plotter as a series of stackable plates. With a couple alignment dowels, it's a snap to create really complex parts in the absence of a proper CNC machine. Once the plates are glued up, it's pretty effortless to sand off the facets. The added bonus is that the crisp layering kind of tells you how far to sand in a given spot. As soon as the ridges are gone, you're there. Lastly, the part sort of self corrects, as the sanding surface area increase as you dig down knocking off the tops of the mountains, areas that need more sanding cut down faster naturally. In this process, the part gets progressively slower to sand with the ever increasing surface area as you approach the final shape.
The first part I made is shown here. It was a little smaller, and it seemed just too tight on width for the Hydraulic. I wasn't that excited to remodel and do it again, but nonetheless, I added some width, a little height to the tower, and I almost tripled the draft angle to get more geometric stability for the mainsheet load.
The final part is shown here in Rhino. In the following pics, one might notice that a singular layer of MDF was messed up coming off the machine. Around mid-stack there is an incorrect layer, but I decided to fill that area with bog rather than re-milling.


After a quick sand to bring it into shape, I rolled on a coat West 105/207 and added fillets (which I later decided to increase in radius).
Finally, it was 4 coats of mold release wax, and one last check of the geometry with the hardware that it will house.


Comments