What's Cook'n?
Propane. It's the bane of my existence... First, let's backtrack.
It was only later that I started to have serious doubts. First, I started stressing about the depth of the sink. Sailboats need deep sinks, and the Smev is not terrible, but not deep either. That obsession regarding sink depth haunts me a little, but it's nothing compared to the fuel puzzle. The Smev burner, in it's shiny perfect little form, runs on, wait for it.... PROPANE!
The more I learned, the more this simple fact tortured me. First, you can't just screw in a green bottle and call it good. Actually, you need a giant list of things to comply with the various rules and regulations that are set out to protect boaters from incinerating themselves. LPG is heavier than air, so it has a bad habit of collecting in the bilge of boats, then violently blowing them up like floating IEDs. To control that risk, here is a quick primer on what it takes to be in compliance. Here's a good article and a summary below.
- Propane bottles must be stored upright (unless they are the type specifically designed to be on their side). The Puddle Pirates, Simon's term, don't care if they are full or empty.
- Propane must be housed in a dedicated Propane Locker with only a top opening lid spaced at least 20" from any other hull opening.
- All fittings must be enclosed in the Locker, and one dedicated line per appliance must travel to the appliance without hose T's, joins, or fittings.
- The Locker must have a 1/2" diameter drain tube near the bottom that exhausts above the waterline.
- One needs to budget for regulators, shut-off solenoids, and special pass-thru fittings to keep vapor in the Locker, and not in the bilge.
To achieve this safety set on the Melges is super difficult. Over the last couple weeks I bought an 11# composite propane tank, and then freaked out on the size, and exchanged it for a tiny 5# version. I gave up completely for awhile and contacted the folks at Safire in the UK about a gimbal, as I came very close to pulling the plug, fully re-making the kitchen island, and jumping ship for a JetBoil Sumo with screw-on canisters, like one might use on the R2AK. Then I went on a huge tangent back to the researching the diesel stove by Wallace, but feedback continues to suggest that it is more amazing in theory than in practice. In the end, I limped back to the propane puzzle, so here we go.

The concept was to do a circular form, not much bigger than my bottle, then add a bit more volume near the top to house the needed 11"WC regulator, solenoid, and whatever else. I made a quick mold out of a $10 cardboard concrete pillar former, glued on a pancake stake of MDF, and covered the whole lot in fancy release tape.


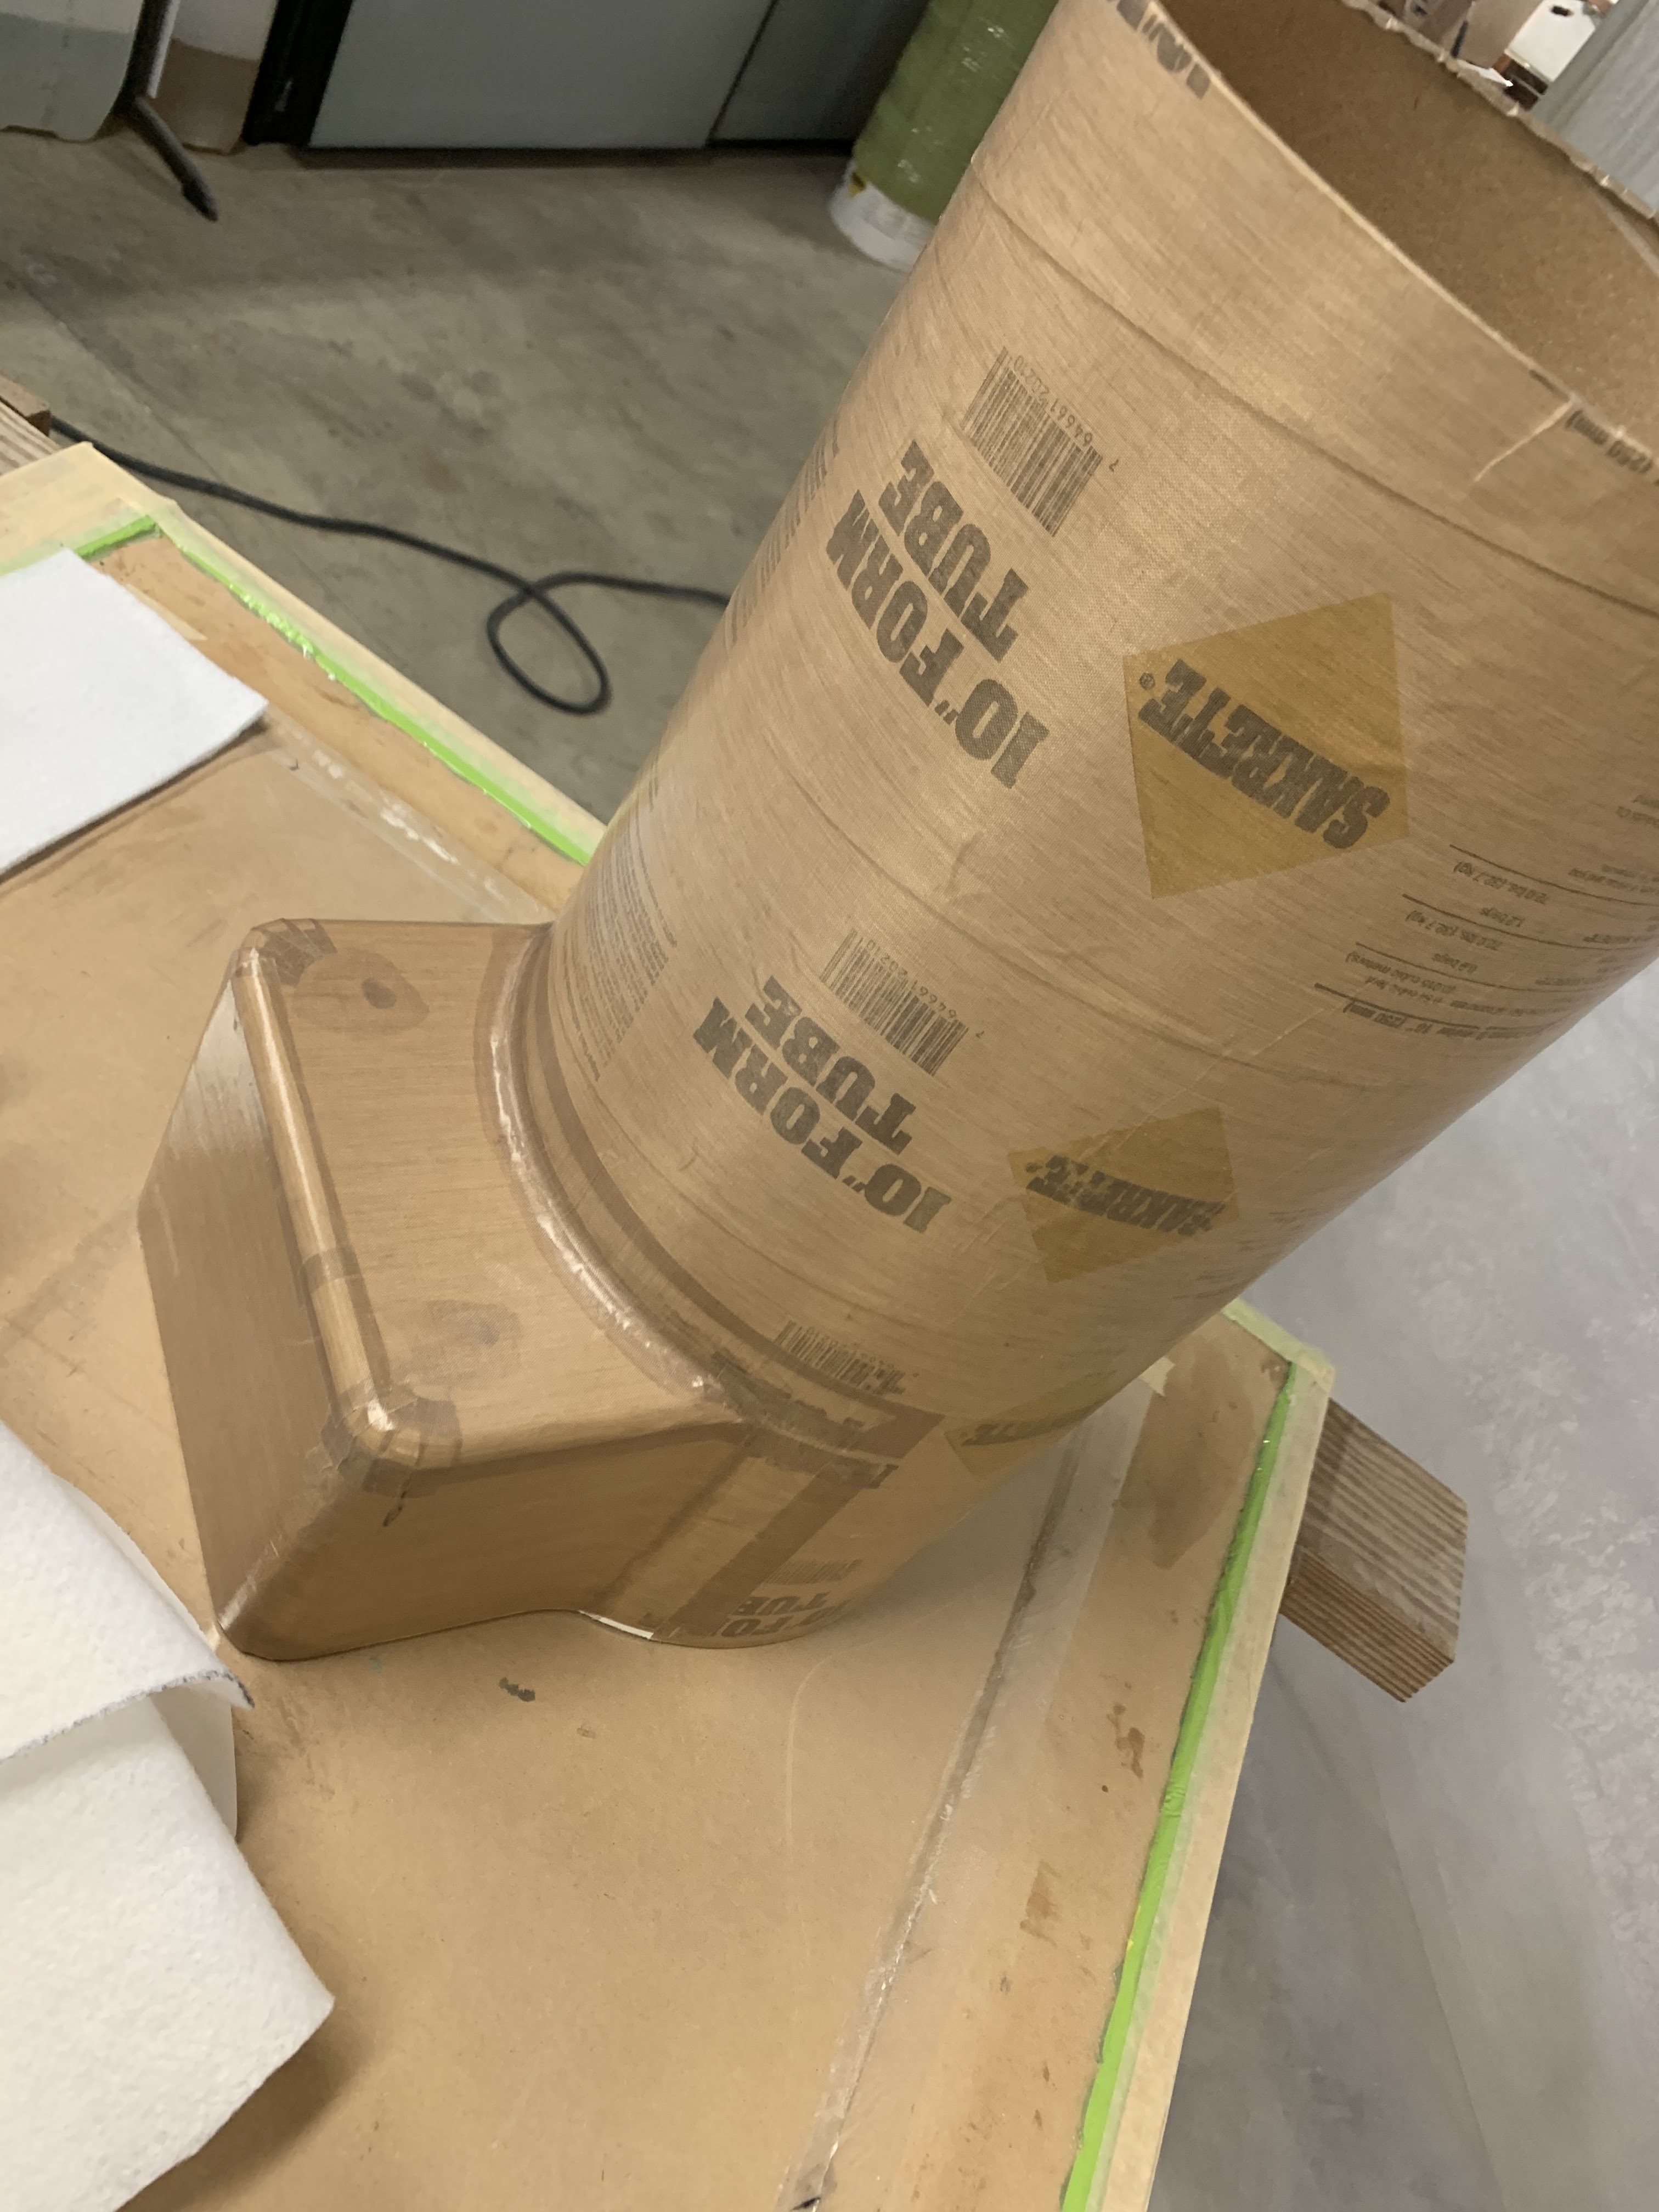
With a pretty ghetto mold cobbled together, I turned my attention to heating and bending some scrap 1/4" PVC core. I was a little nervous, having read about cyanide gas, or something, being emitted from heated foam, so I wore the mask and put the whole sheet in the easy bake oven for about 1.5 hours while watching "Morning Light" with the kids. With the heat lamp and small fan, I was only able to hold the temp at around 135F. Taking the foam out, it was slightly softer, but not really enough, so with Jacque's help we grabbed the heat gun and got more serious.


To bag the part, I decided to try the tube bag I bought ages ago, but have never tried. Since the cardboard was pretty flimsy, and I wanted the part to be close to cylindrical, I laced the bag through the center, then hiked up the outside of the form, like a tube skirt. I cut 4 MDF circles and stacked them inside, together with paint bucket spacers to coax the part to maintain it's circular geometry, even if the bag started pulling unevenly.


With the first skin done, I primed the parts and mixed up some thickened goo and repeated the whole process to bond the core in place. This was another first for me, as I'd never built a panel in steps like this until now. I had a hard time deciding how much glue to build up in there, so I think I erred on the side of too much. If this works, then it still needs an outer skin, and a flat panel for the bottom.


Comments